Blender Tutorial Introduction

Heads up! This tutorial is super old! When I wrote it flash worked on the web and so did Google Picasa galleries. I'm fixing the page here in 2021 (is that the past to you??) but it might not work 100%.... Or 10%. Good luck!

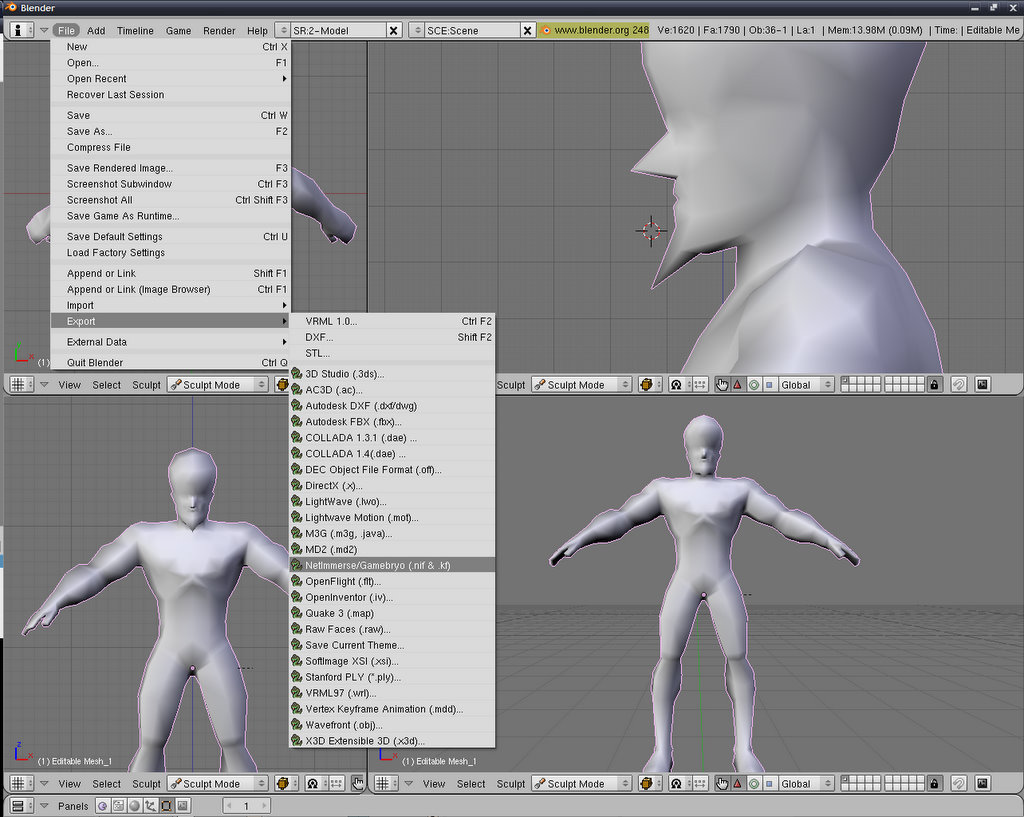
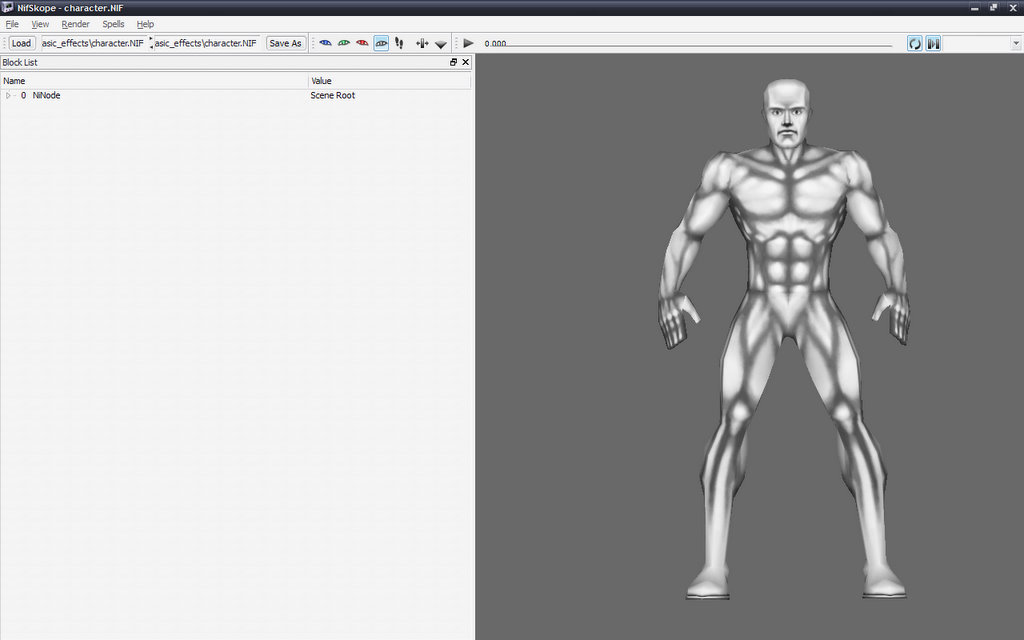
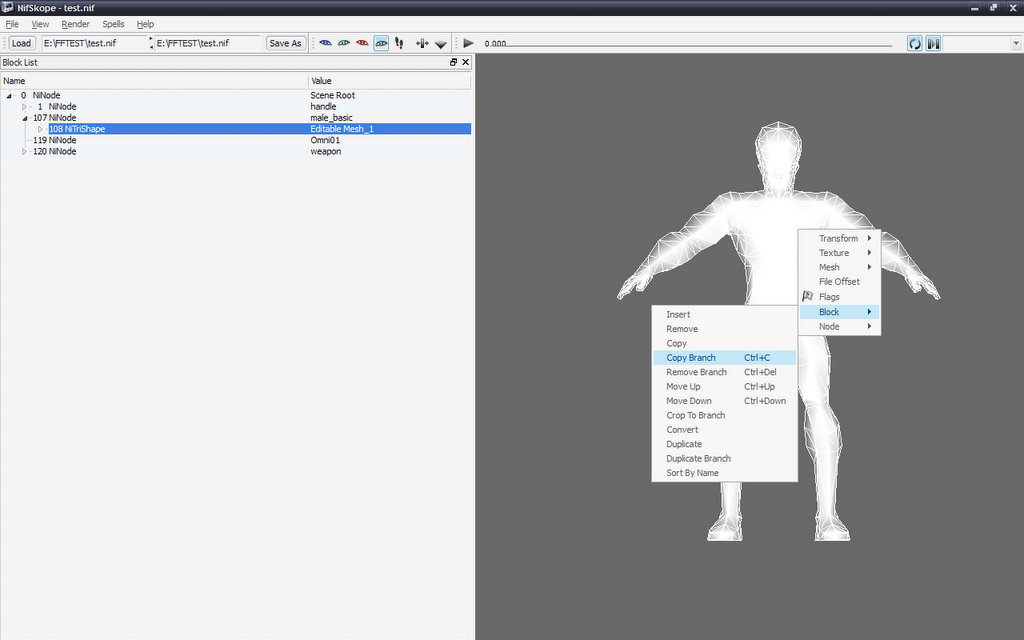
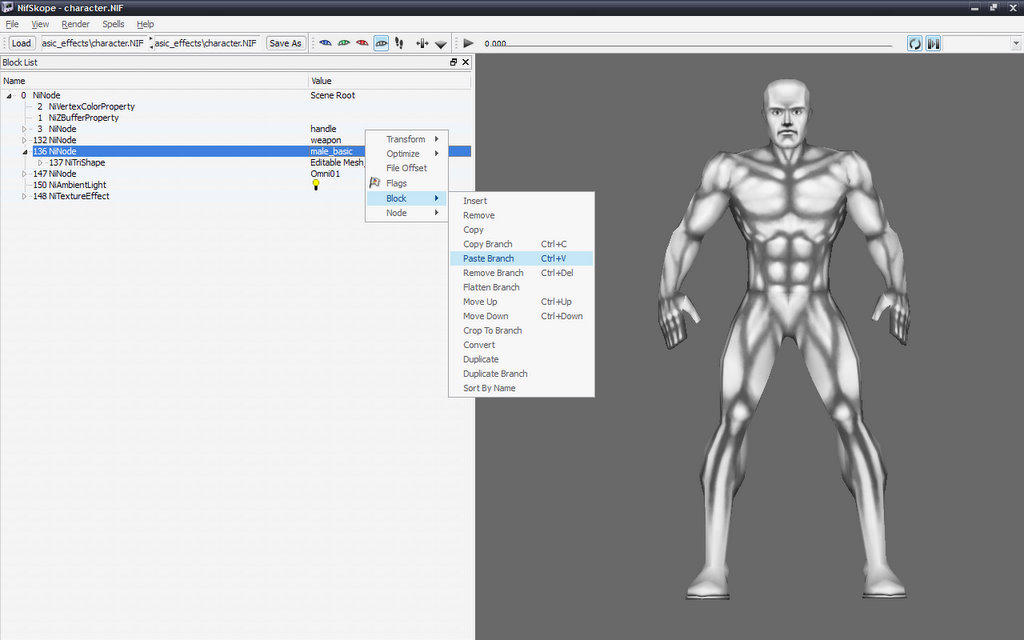
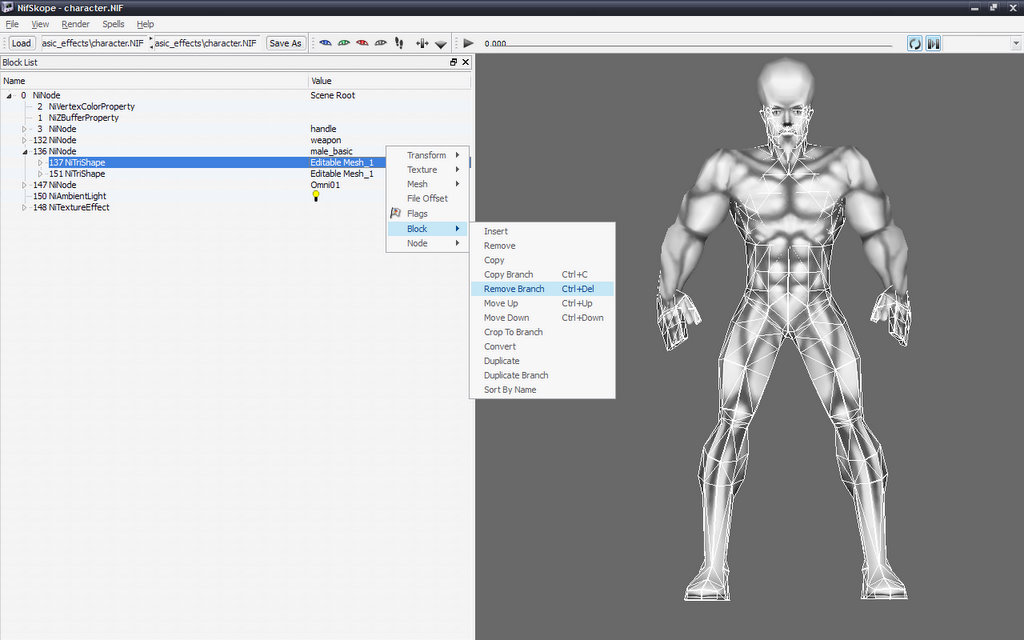
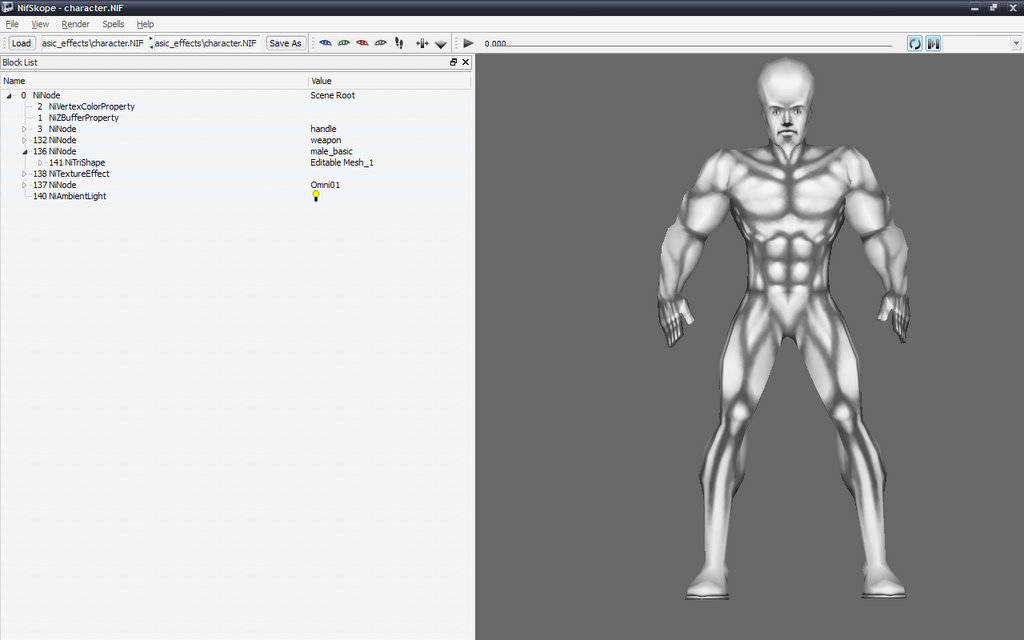
Traditionally 3d Studio Max was necessary to create meshes for Freedom Force, but as time has gone on the current versions of 3ds Max haven't supported Freedom Force well and NifTools has taken up the task of creating export scripts for various 3d modeling programs. We're going to be learning how to modify meshes in Blender for use in Freedom Force. Blender in this case will be used as a supplement to NifSkope. If you aren't familiar with NifSkope then you might want to take a loot at it first. GMax is another option for aspiring meshers. I tried using it for the same purpose but I ended up breaking the 'Skin Instance' and with it the animations.

Important notes on problems that may arise

The biggest problem you will run into is the breaking of the 'Skin Instance' thus keeping the mesh from animating. GMax, as mentioned above, seems to break this is you try and move vertexes around. Blender is much more forgiving and lets you do a lot more before breaking anything. Note that you cannot add or subtract any vertices using my method, so anything beyond re-shaping won't work. I'm not saying it isn't possible, just that I haven't figured out how to do it. What is impossible is creating new animations. Blender can only import .kf from Oblivion and will spout an error if you try and import them from Freedom Force.

The Tools of the trade

NifScripts requires PyFFI to interface with Blender which needs Python to run. Specific version dependencies make it difficult to track down the right installers. That's why I gathered them all here for you.

  1. Python
  2. Blender
  3. PyFFI
  4. NifScripts

Be sure to install them in that order to avoid headaches. I'm assuming you already have NifSkope. Once you're ready. Fire up Blender and get started.

38 steps to greatness

Follow all of my impossibly detailed steps below. It may seem like I'm point out obvious things, but what is obvious to you might not be obvious to everyone.

UPDATE: HERE IS WHERE I AM FIXING THE EMBED IN THE FUTURE WORLD OF 2021

Step 1

This is what you see when you open blender for the first time.

Step 2

Press the 'delete' key. Then select 'Erase selected Object(s)' Dialogue boxes are odd in Blender, but are easy to get used to.

Step 3

Now that the box is gone we can import our .nif file. Select 'file:import:NetImers/Gamebryo (.nif)' from the menus.

Step 4

Find the file you want to import and select import NIF in the top right hand corner.

Step 5

These settings seem to work best when importing but I haven't experimented much.

Step 6

Aha! Now our mesh is in Blender!

Step 7

Use the mouse wheel to zoom in. Middle click and drag changes your camera angle. Shift+Middle click to move the camera up/down/left/right.

Step 8

The view menu is good for snapping the camera to preset angles and shifting from Orthographic to Perspective angles. NifsKope uses Orthographic while CharacterTool uses Persepective. Try it out.

Step 9

Right click on the part we want to edit. In this cae, the male basic mesh.

Step 10

Use the object menu to 'hide deselected' and clean up our view.

Step 11

Now that our view is clear, lets set up our workspace. Right click the dark line between the view space and the top menu. This isn't very intuitive so you might have to fish for it at first. Once you get it, click 'Split Area' to well... split the area.

Step 12

That will give you a bar to move around. It splits the view just like you think it would.

Step 13

You can split up as many views as you like. I think 4 is optimal.

Step 14

Use the view menu to create Top, Side, Front, and Perspective views. Drag the 'Panels' menu at the bottom down to clear some valuable screen real estate.

Step 15

Now is a good time to 'Save Default Settings' so you don't have to walk through these steps again. Unfortunately this will open the mesh up every time. If you delete the mesh and then save next time you open Blender your problems will be solved.

Step 16

Lets meet the tools. So far I've only used Object, Edit and Sculpt so we'll focus on those. You start out in object mode. It lets you click and drag an object and do things like what you can do in Nifskope.

Step 17

The edit tool may seem scary at first. Press 'a' on the keyboard to toggle 'Select All/Deselect' to clear things up.

Step 18

Now you can see all of the Verteces you can move. Press 'b' on the keyboard to bring up a selection box. Drag it over the Verteces on the nose.

Step 19

Now you can move those vertecese wherever you want. Lets give our mesh a big nose. Click the green arrow in your side view and drag it to the left.

Step 20

Congratulations you just made your first modification to the mesh.

Step 21

Right now we can see through to the back of the mesh in Edit Mode. This is usefull for maintaining symetry, but in our perspective view it can be difficult to work with. Drag the view split over till you see the boxes at the end of the menu.

Step 22

This works on a per veiw basis so it only changes your perspective view. This should make your changes much more clear.

Step 23

Next up is Sculpt Mode. It's not as precise as the Edit Mode but it's very useful. We're going to want x-symetry so our mesh isn't lopsided. This might not always be what you want so don't think you have to do it. Lets use Sculpt Mode's smooth tool.

Step 24

Click a few times on the eyes. Note how it maintains symetry while smoothing out the surface. Great right? The smooth tool doesn't work well on some surfaces however click on the nose and chin a few times.

Step 25

Trying to smooth over the nose and chin created breaks and other problems. Edit mode would be better suited for changes to these areas. Crtl+z until you are back to normal. Lets use the inflate tool next.

Step 26

You can bulk a guy up pretty well with the inflate tool, but watch out for odd bulges. It may seem right from one view and be completely broken in another.

Step 27

Let's give him a collosal cranium while we're at it. The inflate tool is great for that. We'll try out the pinch tool next.

Step 28

The pinch tool easy to understand but difficult to master. It does more than just shrink things. It acts like a mini black hole, pulling things toward it. Use it to make our meshes hand dispraportionately small. Lets try the grab tool next.

Step 29

The Grab tool works as a much less precise version of Edit Mode. Grab some thing and move it. Try and give your mesh a wicked goatee but pulling on the chin.

Step 30

We're ready to export our mes. Select 'File:Export:NetImmers/Gamebryo' from the top menu.

Step 31

Fine a good spot for your new nif. DO NOT overwrite your old file. We'll need it later.

Step 32

Drag the view to make this menu bigger so you can see if you need to. Click on 'Freedom Force' or 'Freedom Force vs. The 3rd Reich' to get the correct settings. Be sure to toggle 'Force DDS Extension' so it will be able to use TGA files later. Click Ok when you are ready.

Step 33

Fire up NifSkope and check out your new mesh. Looks good right? Too bad we aren't done. Open the original mesh in NifSkope too.

Step 34

We need to copy over the alterned pieces so they will work with animations properly and fix some errors that might have popped up.

Step 35

Right click on the mesh and select 'Block:Copy Branch' then switch back to the old mesh.

Step 36

Right click on the node one level up from the old 'Editable Mesh' and select 'Block:Paste Branch'

Step 37

Right click on the old 'Editable Mesh' and Select 'Block:Remove Branch' to clean this up. Alternatively you can just hide the old one but this way reduces the file size and loading time ever so slightly.

Step 38

Now we're done. Save your nif over the old one and check it out in the Character Tool. This time everything worked out just fine, but sometimes you can accidentally break the 'Skin Instance' in Blender and everything will be broken. You can also mess up the uv mapping pretty bad, forcing you to correct it in NifSkope before skinning it.

Congratulations

If something went wrong: 1)Be sure to try again. 2)Remember that I don't know any more that you do. 3)Go to Freedom Reborn and post your weird broken results.